View NetCDF Files Using ncview
Another useful tool for visualizing NetCDF files is ncview. Ncview allows quick and easy, push-button visualizations of data within NetCDF files. You can view your data in simple movies, along various dimensions, with different color maps, etc…
Installation instructions
There are two different ways you can install ncview on your computer. The first way is to install ncview in a conda environment. The second is to install the tool on your computer using Homebrew or from the source code directly. For the workshop, we recommend installing ncview using conda within a conda environment. Other installation options are also provided below.
Conda
Open a terminal and either activate an existing conda environment or create a new conda environment to install ncview in.
Ensure you have the correct dependencies.
a) Type
conda config --add channels conda-forgeand hit enter.b) Type
conda config --set channel_priority strictand hit enter.Type
conda install ncviewand hit enter.
Installation on MacOS
Open the terminal, type
brew install ncviewand hit enter.
Installation on Windows
For windows, you need to download the source code from here. Then you need to configure the source code, using the following steps:
Extract the archive: tar xvf ncview-*.tar.gz.
Change directory: cd ncview-*.
Configure the build: ./configure –with-udunits2_incdir=/path/to/udunits/include –with-udunits2_libdir=/path/to/udunits/lib –prefix=/path/to/install.
Compile and install: make && make install.
Add the installation path to your PATH environment variable.
Installation on Linux
Open the terminal.
Terminal command option
b) Type
sudo apt-get install ncviewand hit enter.Homebrew option
a) Type
brew install ncviewand hit enter.
Once ncview is installed, you can type in your terminal ncview myFileName.nc to load up ncview and start visualizing aspects of your NetCDF file.
Ncview Examples
This section includes how to navigate the ncview viewer for a 3D dataset (2D and time). We will be using the stratocumulus_clouds.nc file from the workshop shared Google Drive folder for the following examples. To follow along, please download the stratocumulus_clouds.nc file to your computer.
Type
ncview stratocumulus_clouds.ncinto your terminal and press enter.
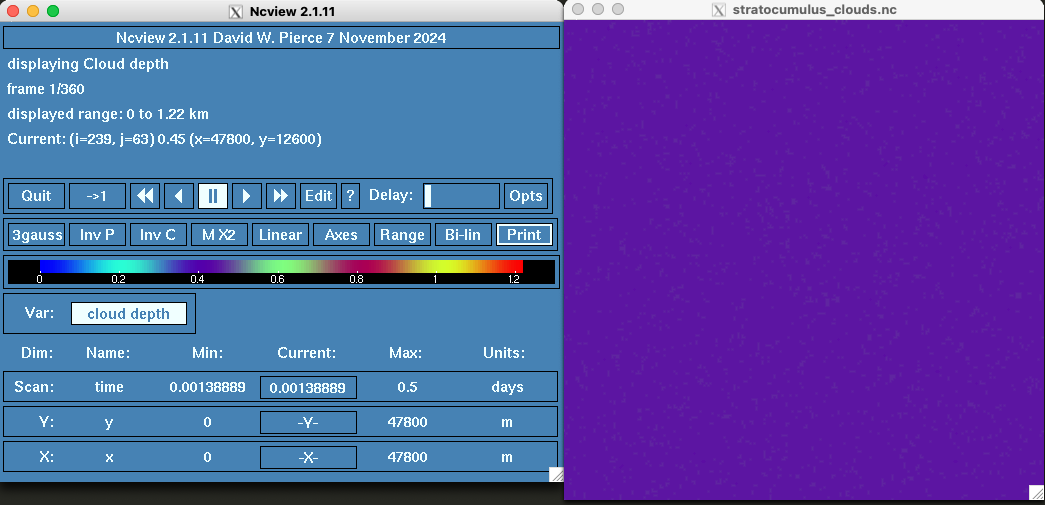
The ncview console along with the stracumulus_clouds.nc viewer will pop up on your screen. The stratocumuls_clouds.nc viewer is showing cloud depth values in kilometers over an x-y grid. On the ncview console, you can change the colormap using the button that says 3guass. You can left and right click to go forward and backwards respectively. The button that says InvC will reverse the colormap and the button that says Linear will change the colormap scale.
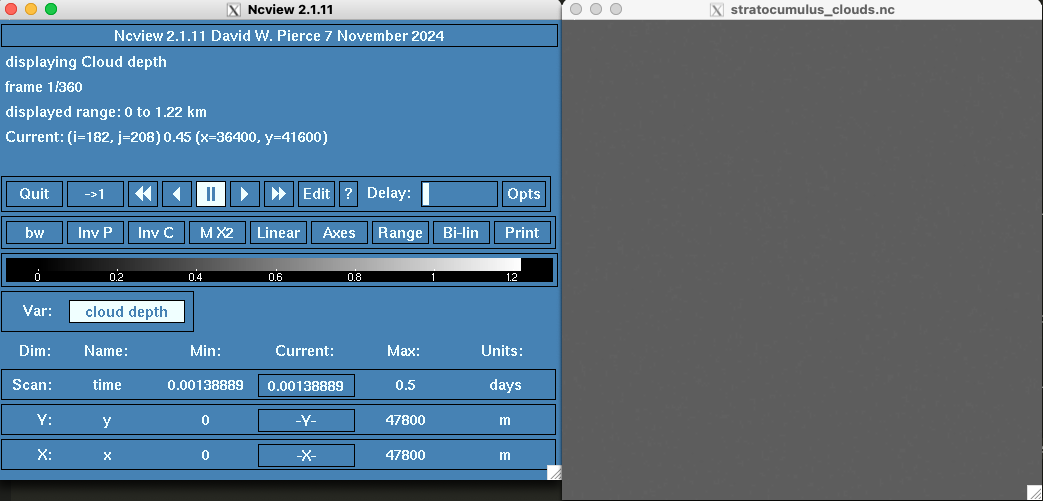
Press the 3gauss button until the button says bw and the stratocumulus_clouds.nc viewer is dark grey.
To view cloud depth values over time, you can press the double arrow botton on the right of the pause button. To pause the simulation, press the pause button. To view one plane at a time, press the single arrow button to the right of the pause button. To restart the simulation, press the button with an arrow and a 1 next to the Quit button.
Click on any point within the stratocumulus_clouds viewer.

By clicking somewhere in the viewer, you can visualize the cloud depth values over time at a specific coordinate point. If you want to close the panel, hit the close button at the top left of the panel. If you hit the red x at the very corner the entire ncviewer will close and you will have to relaunch ncview.
Click on two different points within the stratocumulus_clouds viewer.
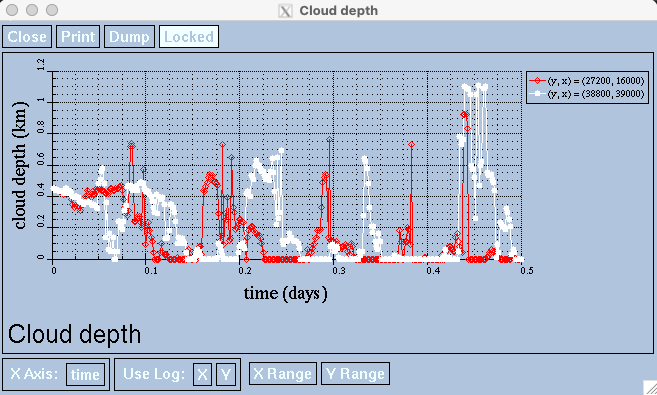
You can view multiple coordinates’ cloud depth values over time by clicking on multiple coordinates within the stratocumulus_clouds.nc viewer.